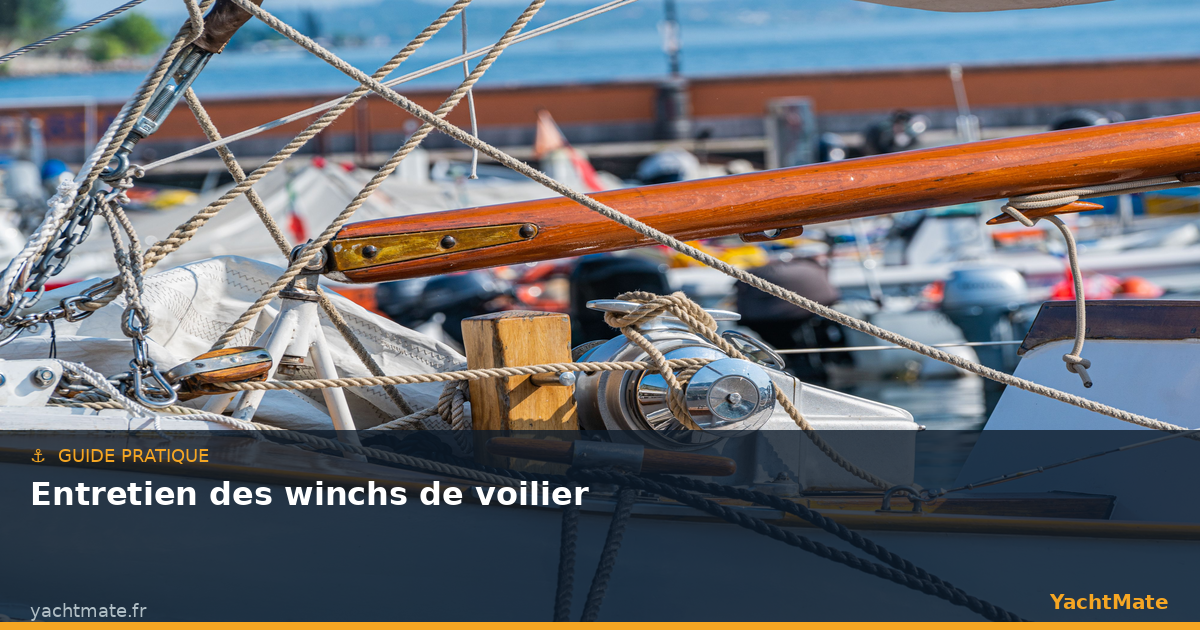
Winches are at the heart of sailing on any sailboat: they allow you to trim sheets, halyards and other running rigging with mechanical advantage and precision. Yet these essential pieces of equipment are often the most neglected during annual maintenance. A poorly maintained winch can seize, jam or fail in the middle of a maneuver — with potentially serious consequences. This comprehensive guide explains how to service your winches step by step, covering brands from Harken to Lewmar, Andersen and Frederiksen.
Why Service Your Winches Regularly?
A sailboat winch is a precision mechanism permanently exposed to a particularly hostile environment: salt, moisture, UV rays, sand and rope fibers. Without maintenance, grease degrades and mixes with these impurities to form an abrasive paste that attacks bearings and pawls. The symptoms of a poorly maintained winch are characteristic: stiff or irregular rotation, abnormal clicking, jamming in one direction, or worse — an unwanted backwind where the handle returns without resistance.
The recommended frequency is at least once per season, ideally in spring before launching. On boats sailing intensively or in tropical saltwater, two annual services are preferable. The operation takes between 30 minutes and 2 hours depending on size and model, and requires no particular technical expertise — just method and the right products.
Before disassembling your first winch, photograph each step of the disassembly with your phone. These photos will serve as reference during reassembly and prevent many mistakes, especially with complex multi-speed models.
Required Equipment
You don't need a fully equipped workshop to service your winches. The basic materials include:
- A flat and Phillips screwdriver (sometimes an Allen key depending on the brand)
- A tray or container to collect all parts
- White spirit or dedicated marine degreaser and a brush
- Clean, lint-free cloths
- Special winch grease (Harken One Drop, Lewmar Winch Grease, Andersen lubricant)
- A syringe or fine brush to apply grease
The golden rule: never use WD-40 or ordinary grease on your winches. WD-40 is a degreaser, not a long-lasting lubricant. Automotive grease softens in heat and attacks seals.
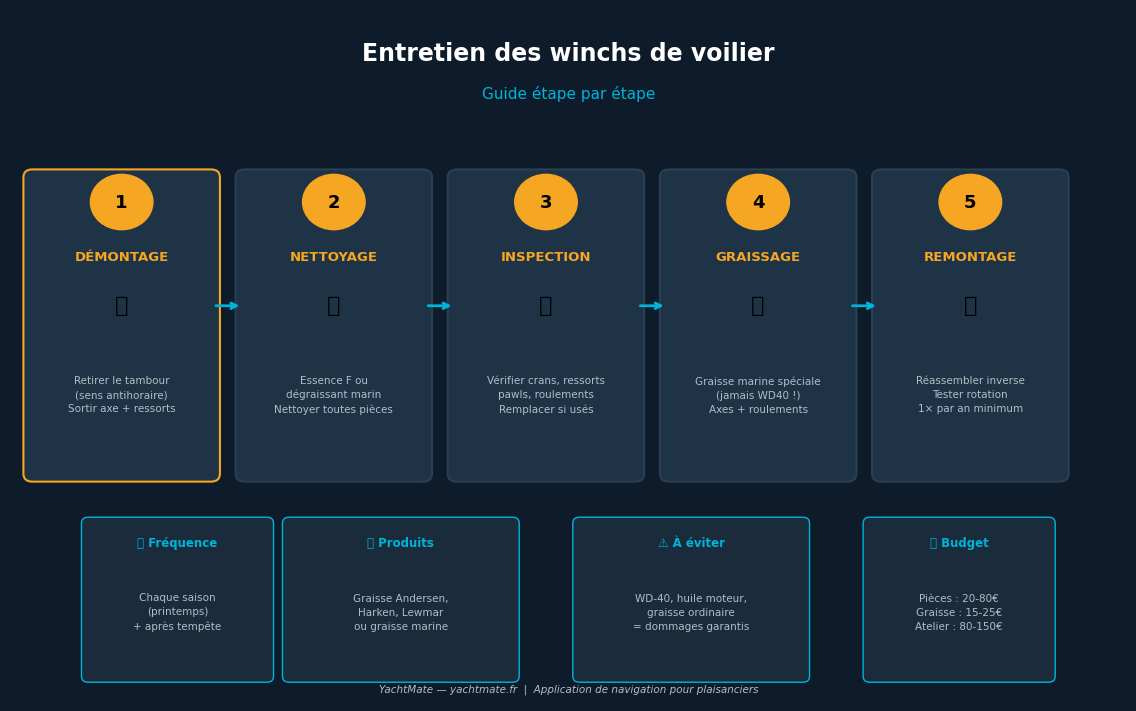
Step 1: Disassembly
The disassembly procedure is similar on most modern winches. Start by removing the handle and lines. On most models, the drum (the outer rotating part) is simply removed by turning it counter-clockwise and lifting. Some models have a locking screw on top — check before forcing.
Removing the Drum
Once the drum is lifted, you'll discover the central axle with its bearings, springs and pawls (clickets). Place each part in order on your tray, photographing as you go. The small pawl springs are the parts most likely to jump out and get lost — be vigilant.
Removing Internal Components
Depending on the winch's sophistication (1, 2 or 3 speeds), you'll find one or more sets of gears and ball bearings. Remove them carefully and note their orientation. On 3-speed winches like the Harken 60 ST, the internal architecture can be complex — in this case, consulting the technical manual available on the manufacturer's website is strongly recommended.
Place a strong magnet in your collection tray. It will automatically capture small springs and screws that might fall, saving you a long search on deck.
Step 2: Cleaning the Parts
This is the longest but most important step. Soak each part in white spirit or marine degreaser for a few minutes, then scrub with a stiff brush to remove old grease, crystallized salt and impurities. Rinse with fresh water and dry thoroughly with a clean cloth — residual moisture is the enemy of bearings.
The winch body (the part fixed to the deck) deserves special attention. Clean the pawl notches thoroughly: any impurity at this point can cause backwinding or jamming. A cotton swab soaked in degreaser is perfect for reaching narrow areas.
Step 3: Inspection
Before re-greasing and reassembling, visually inspect each component. Pawls should show no signs of wear on their teeth. Pawl springs must be flexible and not deformed. Ball bearings must rotate freely without stiff spots or excessive play. The inner drum must show no cracks, deep scratches or deformation.
If a component looks doubtful, replace it. Spare parts kits are available directly from manufacturers (Harken, Lewmar, Andersen, Frederiksen) for around twenty to eighty euros depending on the model. Better to invest now than to find yourself with a non-functional winch while sailing.
Step 4: Greasing
Use only special marine winch grease. These greases are formulated to resist salt, heat and moisture while remaining fluid enough not to impede small mechanisms. The most reputable are Harken One Drop Lubricant, Lewmar Winch Grease and Andersen lubricant.
Where to Apply Grease
Grease the ball bearings by saturating them evenly — not too much, as excess grease attracts dirt. Apply a thin layer on the central axle and the friction surfaces of the gears. Pawls and their springs receive a drop of light grease or special oil (never too much, or the pawl may slip).
Grease pawls and their housings sparingly: too much grease can cause them to slip and prevent engagement. A simple light touch of a greasy finger on the spring is often sufficient.
Step 5: Reassembly and Testing
Reassembly follows the reverse order of disassembly. Use your photos as reference. Start by replacing the bearings and gears, then the pawls and their springs, checking they engage correctly in their housings. Replace the drum by turning it clockwise until you hear a locking click.
Before closing everything up, perform a hand rotation test: the drum should rotate freely in the working direction and be blocked in the other direction by the pawls. You should hear the regular, reassuring clicking of the pawls engaging. If the drum rotates freely in both directions or makes an abnormal noise, disassemble again and check the pawl orientation.
Preventive Maintenance: Good Habits
Between full services, a few simple gestures extend the life of your winches. Rinse them with fresh water after each saltwater outing. Avoid allowing water to pool on the winch head. Once a month during the season, drop a few drops of winch lubricant into the central axle while rotating the drum to distribute it evenly. And of course, avoid putting your boat under excessive strain by jamming the sheet on a winch under load — overloading is the main mechanical enemy of these fittings.
Budget-wise, expect around €20-80 for replacement parts if needed, €15-25 for quality grease, and €0 for labor if you do the work yourself. Having a professional service done typically costs between €80 and €150 per winch depending on region and model complexity.
When to Call a Professional
Some situations justify calling a rigger or specialist workshop: a winch that has suffered a violent impact or extreme overload, a complex 3-speed model you're not confident reassembling, or an electric winch whose electromechanical components require specific tools and knowledge. Electric winches (such as Harken Electric or Lewmar EVO) combine winch mechanics and electric motor — their maintenance must include checking wiring, thermal protection and motor brushes.
Sail Better with YachtMate
YachtMate accompanies you on board with navigation tools, real-time marine weather and practical guides for all your equipment. Available on iPhone and Android.
Discover YachtMate