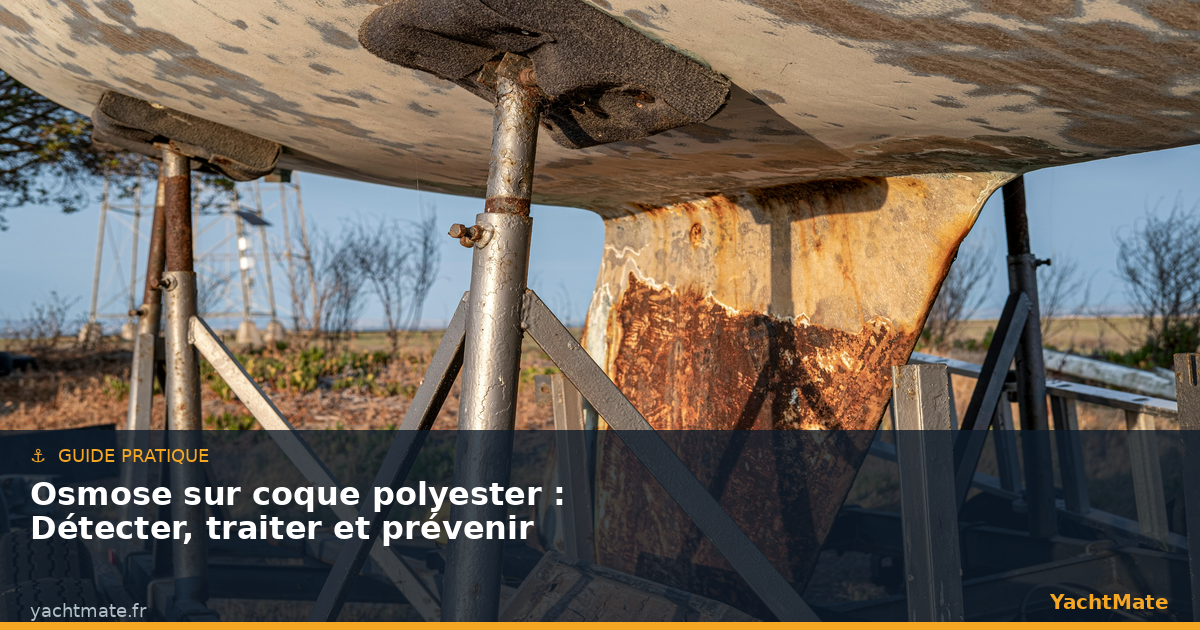
Osmosis is one of the most dreaded conditions for owners of fibreglass (polyester) boats. Often discovered during the annual haulout, it manifests as blisters below the waterline and, if neglected, can seriously compromise the structural integrity of the hull. Yet with the right tools and a methodical approach, osmosis can be detected early, treated effectively and prevented long-term. This complete guide covers everything you need to know.
What is osmosis and why does it affect polyester hulls?
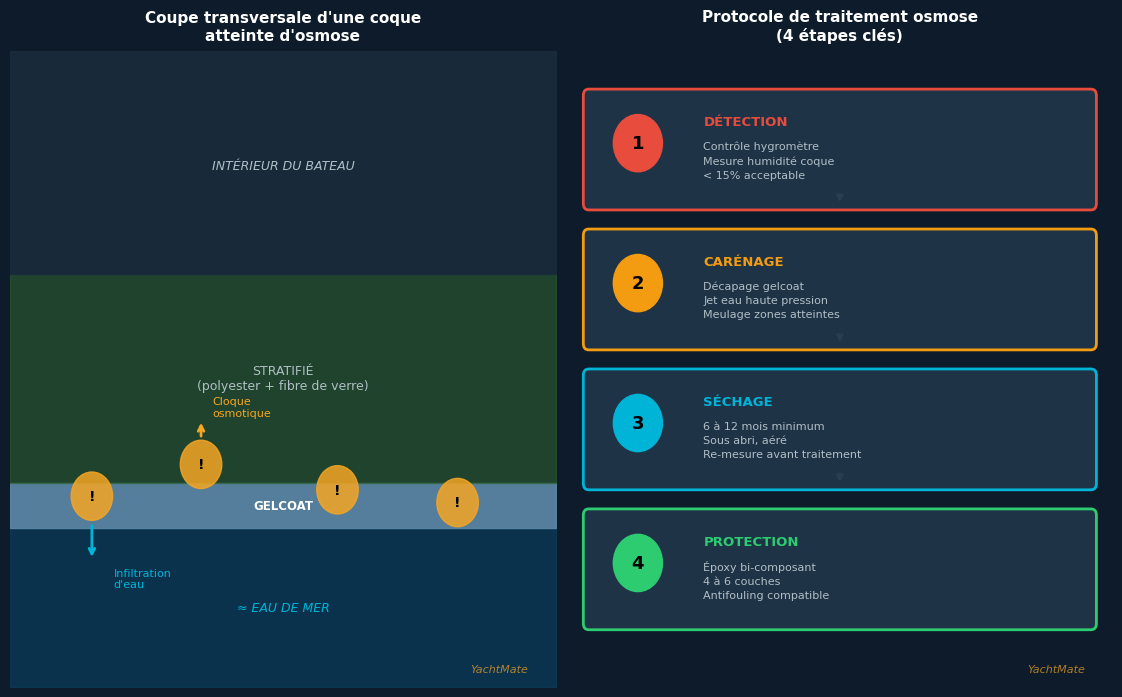
Osmosis is a natural physico-chemical process: when two solutions of different concentrations are separated by a semi-permeable membrane, water migrates from the less concentrated solution towards the more concentrated one. In a polyester hull, the laminate itself acts as that membrane. Seawater slowly penetrates through the gelcoat, encounters residues of styrene, alcohols and esters left over from the incomplete polymerisation of the polyester, and creates solutions with high osmotic pressure.
The result: bubbles of acidic liquid form between the laminate layers, lifting the gelcoat and creating the characteristic blisters. This process is inevitable in the long run for all standard polyester boats, but the rate at which it appears varies considerably depending on laminate quality, sailing conditions and the maintenance applied over the years.
Osmosis is not inevitable! A boat hauled out every winter and well protected with an epoxy barrier system rarely develops blisters before 15 to 20 years of sailing. Time in the water is the number one factor.
How to detect osmosis: the telltale signs
Early detection is the key to a simple and cost-effective treatment. Here are the methods to use during haulout, when the boat is out of the water.
Visual inspection
Start with a thorough examination of the underwater hull using good raking light. Look for blisters, delamination areas, star-shaped cracks in the gelcoat or brownish staining. Osmotic blisters typically appear slightly swollen and damp. On some boats, simply running your hand flat along the bottom reveals irregularities invisible to the naked eye.
The knife or chisel test
Carefully pierce a suspicious blister with the tip of a knife. If a yellowish or brownish liquid escapes with a vinegary smell, you are dealing with an active osmotic blister. The odour is unmistakable — it is the sign of acetic acid produced by the degradation of polyester.
Moisture measurement with a Tramex or moisture meter
This is the most reliable method. A surface moisture meter (such as the Tramex Skipper or equivalent) measures the moisture content of the laminate without drilling. Key thresholds to remember:
- Below 15%: normal level, no treatment required
- 15–20%: elevated moisture, monitoring recommended
- 20–25%: early osmosis, preventive treatment advised
- Above 25%: confirmed osmosis, curative treatment essential
Take multiple readings across the entire hull and map the wettest areas. Some sailors use YachtMate to log these readings directly in the boat's digital logbook, complete with dated photographs.
Treating osmosis: the step-by-step protocol
A properly carried out osmosis treatment takes time, rigour and quality materials. Rushing the steps is the main cause of failure and recurrence. Here is the protocol recommended by professional boatyards.
Step 1: Stripping the hull
Before any treatment, the old antifouling and damaged gelcoat must be removed. Depending on the extent of the damage, a chemical stripper, high-pressure water jetting (400–600 bar) or mechanical planing is used. The goal is to reach clean, sound laminate free of old product residues. All blisters must be opened, drained and cleaned. This is physical work that allows no compromise.
Step 2: Drying — the longest phase
This is the step many boat owners rush, to the detriment of treatment effectiveness. After stripping, the laminate must come down below 12–15% moisture before any epoxy can be applied. This phase typically takes 6 to 12 months depending on the severity of the osmosis, the season and storage conditions. Keep the boat under a ventilated shelter, protected from rain and direct sun. Check the moisture regularly with your meter.
Log the start date of drying and monthly moisture readings in YachtMate. You will have a precise history to show your boatyard or insurer in the event of a claim.
Step 3: Applying the epoxy resin
Once a satisfactory moisture level is achieved, a two-part epoxy system is applied in multiple coats. Market-leading products include International Interprotect, Epifanes Multiprotect and Hempel Light Primer. The typical protocol is as follows:
- Coats 1–2: penetrating epoxy (adhesion primer)
- Coats 3–4: high-build barrier epoxy
- Coats 5–6: finishing epoxy or antifouling tie coat
Strictly observe the inter-coat drying times specified by the manufacturer, generally 4–8 hours at 15°C. Light sanding between some coats improves adhesion. The total dry film thickness should reach 400–500 microns for lasting protection.
Step 4: Topcoat antifouling
Antifouling is applied last, over a fully cured epoxy layer. Choose an antifouling compatible with epoxy systems — read the manufacturer's data sheet carefully. In high-fouling areas (Mediterranean in summer), two coats of ablative antifouling are generally recommended. Also respect the launch window after application, often a minimum of 24–48 hours.
Photograph each treatment step and record the product references in YachtMate. This information will be invaluable for future seasons and can positively influence the resale value of your boat.
Preventing osmosis: best practices
The best treatment is prevention. Several simple habits can considerably delay the onset of osmosis, or even prevent it altogether on new boats.
Haul out for winter
This is the single most effective measure. A boat kept ashore for 3–5 months per year allows the laminate to dry out naturally. If your marina offers dry winter storage, use it every year. The cost is quickly offset by savings on future osmosis treatments.
Renew antifouling regularly
Degraded or absent antifouling no longer protects the gelcoat. Reapply it every year or every two years, depending on the product type and your sailing conditions. Also inspect the condition of the gelcoat: any deep scratch or crack is an entry point for water.
Apply a preventive epoxy system on purchase
On a new or recent boat with a healthy hull, applying a preventive epoxy barrier system is the best long-term investment. 400–500 microns of well-applied epoxy on a dry hull provides a near-impermeable barrier for 10–15 years. This option is now offered by most boatyards at delivery.
Choose a vinylester hull
If you are buying a boat, know that modern production boats increasingly use vinylester resin instead of standard polyester for the outer layers. Vinylester is significantly less water-permeable and offers far superior osmotic resistance. It is a criterion worth verifying during negotiation.
Cost of osmosis treatment: what to budget
The budget for an osmosis treatment varies considerably depending on the size of the boat, the extent of the damage and whether you choose a boatyard or DIY treatment. As a rough guide for a 10-metre yacht:
- Full treatment at a boatyard: €3,000–8,000 depending on hull condition
- DIY treatment (materials only): €800–2,000 plus your own labour
- Preventive treatment on a sound hull: €400–900 (materials) or €1,500–3,000 at a yard
These figures underline the value of early detection and prevention. Osmosis treated in its early stages costs two to three times less than a severely affected hull — which is why regularly checking your hull's moisture levels at every haulout makes such good sense.
Osmosis and resale value: what buyers check
When selling a second-hand boat, the condition of the hull with regard to osmosis is one of the first things serious buyers and their surveyors check. A survey report certifying the absence of osmosis or a recent, well-documented treatment is a strong selling point that can justify up to 10–15% difference in price. Conversely, a severely affected hull can block a sale or lead to a significant discount.
Always keep invoices and technical data sheets for any products used during treatments. A complete maintenance dossier with dated photographs and regular moisture readings reassures buyers and adds value to your boat. YachtMate can help you build and centralise this maintenance history in a simple, professional way.
⚓ Track your hull maintenance with YachtMate
Digital logbook, maintenance reminders, moisture reading tracking and treatment history: YachtMate brings it all together so your boat stays in perfect condition.
Download YachtMate for free